Have you seen the sugar monster?
Halloween is a strange and wonderful time for everybody. Isn’t it priceless to see the effort kids (and grown-ups) put into dressing up and walking around begging for treats? If scary is what you’re going for, try getting in between the little ones and their candy, or worse, sticking around after they’ve had too much! No matter how you look at it, kids, candy and Halloween together is like a great horror movie – so much fun, because it’s so scary!

The double-edged sword of candy and Halloween is a long discussion. Every Halloween my doorbell rings, I hear the words ‘trick or treat’ and candy leaves my house. But no success yet in tricking anyone to leave the candy for me.
I seem to have better luck surprising people with design tricks in E3.series, so let’s talk about that instead. There are some treats in store for you as well but let’s start with the tricks.
Losing yourself in 256 levels of excitement…
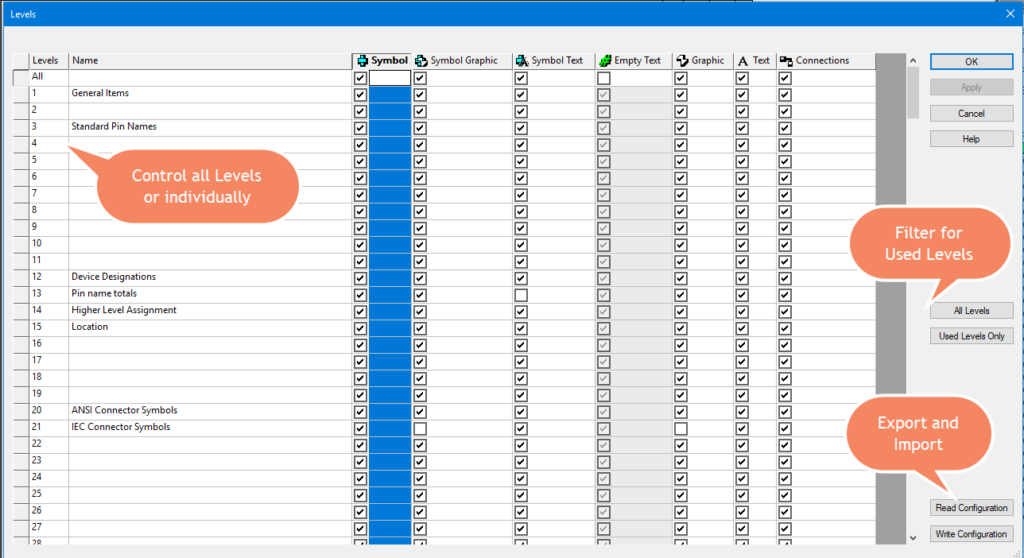
The age-old drafting function ‘layer’ is widely used in design to manage the information on a drawing. Needless to say, it is easy to forget it exists in E3.series with all the other automation and intelligence making life easy. Layers are known as Levels in E3.series and they are, as you might guess, a much more intelligent version than the ghost of the old design tools. The trick here is to use the levels to help you standardize and reduce the effort to create a perfect drawing.

Levels in E3.series can control multiple items all at once or you can choose to control them individually. Easily show/hide elements of your choice on any of the 256 levels available in the project. The standard library uses levels as a basic guide for standardization, making the library a perfect place to assign specific levels to the design elements controlled by project-specific configuration.
Each level is sub-divided into:
- Symbol
- Symbol Graphics
- Symbol Text
- Empty Text – Attributes or Text Types that have no value hidden by default
- Graphic
- Text
- Connections
Users can quickly change project configurations by using Read and Write level configuration options. The ability to export, standardize and automate improves time savings and productivity. If you haven’t tried levels before or simply forgot about them it is time to give it a shot and level up your designs.
The curious case of connector information
The information displayed in a drawing can vary from one project to the next. You shouldn’t have to go change the library every time or have to maintain separate libraries to adhere to standards. In E3.series the library can truly be a single source of truth – the question is ‘how’ isn’t it?
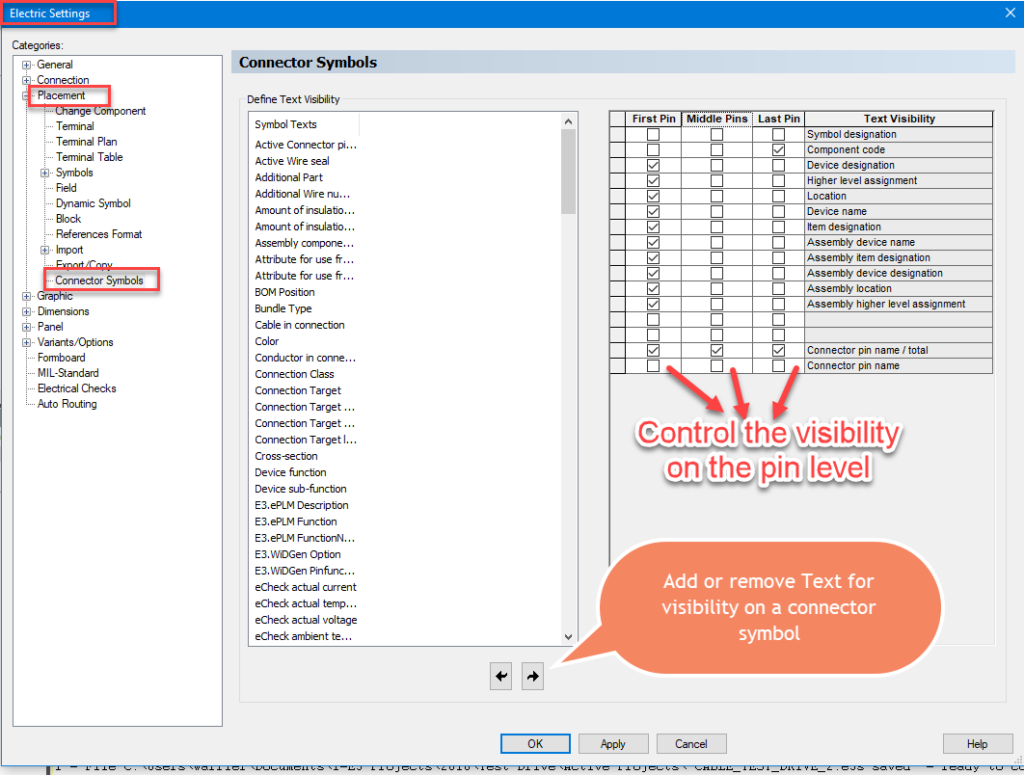
I am sure you can relate to having to display or find one particular detail of a connector at the worst time possible. Invariably, caught wishing you had saved it the last time you had to go look it up in a datasheet. Levels, although great, are not a solution for the dynamic nature of information attached to connectors and their pins. The challenge; do you make it visible all the time in the drawing? Would it be better for this information to show up on the drawing as and when you need it?

Connectors have their own attribute visibility manager in the settings for any project in E3.series. The visibility of the attribute text is managed for the first, last and the middle pins. If you think about attributes like a part number or device tag, you’ll likely want to show the part number below on the last pin, and the device tag only above a set of connector pins rather than on each pin.
The idea here is to not have to create custom symbols for pins but rather use generic symbols. A novel solution like this enables configuring your project as the requirements evolve. I use about eight pin symbols to represent thousands of connectors and these settings are a blessing. I don’t even want to think about managing all those connectors without this feature.
Enjoy these tricks and treats on your next design project, and if you find yourself with any leftover Halloween candy, I hope you’ll send it my way!
