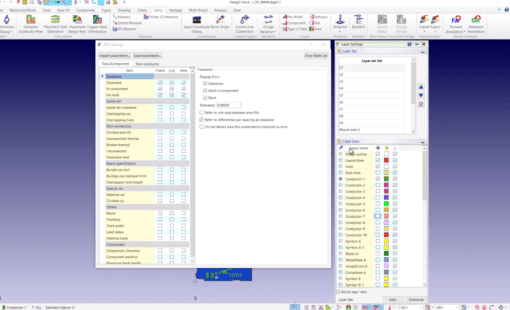
It is that time of year again, it’s the spooky season. This means the leaves are changing, for some of us. The smell of fall and pumpkin spice is in the air. Halloween decorations are out and ready for trick-or-treaters. Also, this year’s Zuken Halloween Tips and Treats are here! This year we have five new hauntingly good Halloween tips and treats for you. No spells or potions are required. However, viewers beware these tech-tip videos are full of surprises. Happy Halloween!
Swapping Gates in CR-8000
Swapping Gates will help you accomplish a cleaner layout when routing a printed circuit board. It makes sense to Swap Gates to reduce the crossing of traces and to reduce it via count on your board. Also, you can swap many gated parts without changing the design. Some examples are logic gates And, Nand, Or, and Nor. In CR-8000 you can easily Swap Gates in Design Force, and then Back Annotate the changes to Design Gateway. First, you must select a part that has been set up for Gate Swapping in the Library. Then when you select a pin, you will see a flag on the pins that are eligible for swapping. The software will not allow you to arbitrarily swap pins. Finally, after swapping the Gates you must Back Annotate to update the schematic with your changes. This video is a demonstration of how to Swap Gates in CR-8000.
How to Swap Connector Table Symbols on the Formboard
On your cable/harness drawing, you may not want the same Connector Table symbol for each device. Perhaps you decided you wanted a different table symbol after placing it. Whatever the reason behind the need for changing the Connector Table symbol, in E3.series it is easy to do. By using the Symbol Properties you can change the Connector Table symbol assigned. Resulting in an update to the information of the new Connector Table. The update will add and/or delete the information as required. This video walks through how to easily swap the existing Connector Table symbols to another.
Control Panning Around the Design Canvas
One may ask themselves, I wonder if there is a setting in Design Force where the tool automatically pans when you hit the edge of the display window? Like an imaginary border where auto-pan turns on when entering that border. Although that would be a nice feature. We don’t have the same Dynamic Pan function in Design Force as we have in Design Gateway. However, what you can do to aid with panning is to change the setup for the mouse wheel. By using the mouse settings you can configure different panning options. Some of these options include a “smooth pan” and an “auto-scroll” option. By enabling either, when you click/drag the mouse wheel the cursor changes and you can move the canvas. Here is a video to show you how to use these panning options in Design Force.
Add E3.CutOut to E3.series
If you are looking for a tip on how to save time when needing to open E3.CutOut this is the tip for you. E3.CutOut is an E3.series add-on tool that outputs a cut-out drawing from a selected panel design. This output can include graphical details for items such as drill holes, cut-outs, and restricted areas. A user can launch E3.CutOut externally from E3.series. By running the application directly from the file explorer directory. However, by creating an add-on command in E3.series for E3.CutOut the user can save time and effort. Creating an add-on command in E3.series is easy to do using the Customize window under the Tools menu. Simply go to the Add-ons tab, create a new add-on, and place the add-on command on a toolbar. Lastly, be sure to save your Workspace Configuration to lock the new changes. This video is a demonstration of how to add the E3.Cutout application as an add-on command in E3.series.
GPM Pin Swap in CR-8000 Design Force
CR-8000 Design Force 2020 has a new treat that we want to share with you. If you didn’t already hear, CR-8000 Design Force 2020 has a new feature to swap GPM pins. From Design Force 2020, the user can both apply a pin swap to the circuit and output the information to the FPGA tool. Helping to make swapping GPM pins more efficient. This new feature is simple to do in a GPM project. First, the GPM project needs to be set to the “External Access Mode”. Then in Design Force, you can target a component, and select the pins that you want to swap. After swapping the pin, you can right mouse click, and select Data End to apply the pin swap. This video goes through the process to use the GPM pin swap feature.
Don’t get spooked!
Don’t let the thought of trying some of these new Zuken Halloween tips and treats spook you. You might just find a new favorite!
Related Products

- Products
E3.series is a Windows-based, scalable, easy-to-learn system for the design of wiring and control systems, hydraulics and pneumatics. The out-of-the-box solution includes schematic (for circuit and fluid diagrams), cable (for advanced electrical and fluid design), panel (for cabinet and panel layout), and formboard (for 1:1 wiring harness manufacturing drawings). Integrated with MCAD, E3.series is a complete design engineering solution from concept through physical realization and manufacturing output.

- Products
Building a competitive product today is much more difficult than a few years ago. Existing PCB-centric design processes are limited to a single PCB and do not provide the necessary tools for today’s competitive product development environment. PCB-centric design processes are falling behind.


